DIY Dollar Tree decor ideas abound on the internet and I’m always amazed at people’s creativity. Why can’t I think of these amazing craft ideas while shopping at Dollar Tree? Well, one day I actually did come up with a cool DIY project using Dollar Tree supplies so I’m going to share it with you!
Book folding art? Book flowers? Book topiaries? Dollar Tree DIY centerpieces? I wasn’t really sure what to call this easy project. We’ll go with Dollar Tree DIY centerpieces since I think they’d make beautiful ones without spending much money at all. It’s certainly cheaper than purchasing supplies at a craft store like Hobby Lobby!
Easy Dollar Tree DIY Project
This DIY Dollar Tree decor idea is made entirely from craft supplies found at the Dollar Tree. If you want to be even more thrifty, you can make this Dollar Tree craft with an old book instead of buying a new one for $1. This craft is a simple way of adding a little bit of flair to your table or bookshelf without spending a ton of money.
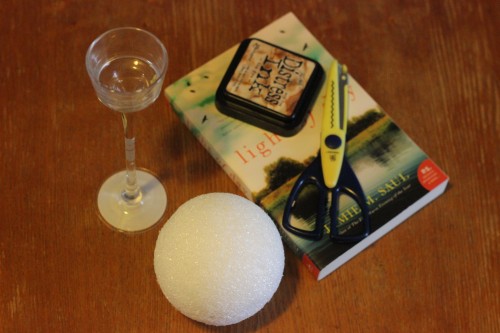
You will need:
- Candleholder – the one pictured is from The Dollar Tree
- 4″ Styrofoam ball – also from The Dollar Tree
- A book – Grab one for $1 or thrift a classic that is meaningful to you. I know nothing about the book I chose except that I liked the way the type looked. Hopefully, there are no swears decorating my living room. In a few years, the kids will have fun looking for them.
- Pinking shears or decorative scrapbooking scissors
- Stamp Pad – Optional if you’d like the edges inked for a rustic look. I quickly realized I was going to be too lazy for that but it would add an extra touch to this DIY idea if you have the time to do it.
- Hot glue gun and glue sticks
- A paper trimmer
- Epoxy glue – If you have pets or small children you’ll need to attach the foam ball to the candle holder with something more substantial than hot glue. If you have neither, your topiary tree will be just fine…along with the rest of your nice things that those of us with cats and/or kids wouldn’t know anything about.
Step 1 – Start binge-watching something on Netflix because this project will take about 2 hours.
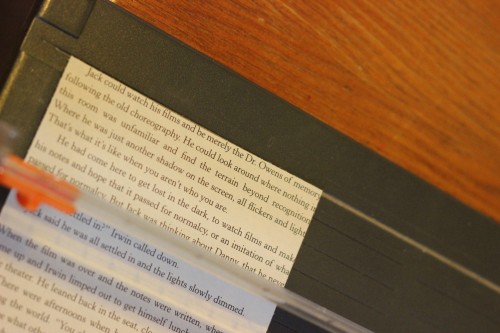
Step 2 – Rip out about 50 pages from your book. The exact amount of pages you’ll need will depend on how big the pages are. Use a paper trimmer to trim the margins off. Also, avoid using pages that begin or end a chapter for this particular upcycled book craft as there is too much white space. You want all that pretty type to show!
Step 3 – Rip out about 50 pages from your book. The exact amount of pages you’ll need will depend on how big the pages are. Use a paper trimmer to trim the margins off. Also, avoid using pages that begin or end a chapter for this particular upcycled book craft as there is too much white space. You want all that sex and violence pretty type to show.
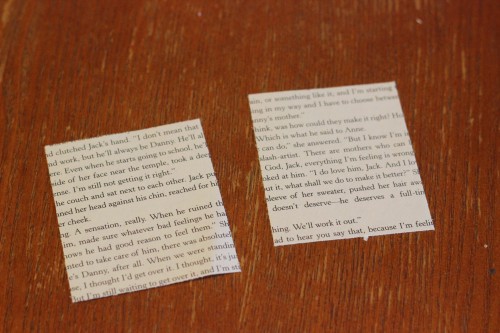
Step 4 – Cut 2.5″ x 3″ rectangles from each page. I was able to get about 4 from each page and cut four pages thick with the trimmer.
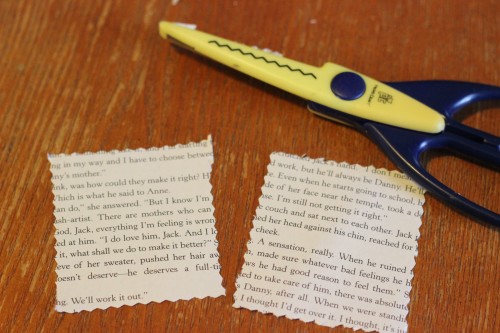
Step 5 – Trim the edges of each piece with pinking shears. Nothing naughty so far, but too much telling and not enough showing. Probably why the book was at the dollar store. 😉
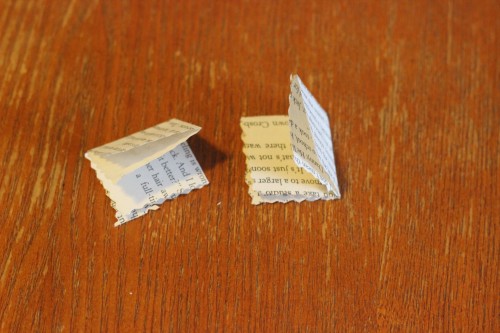
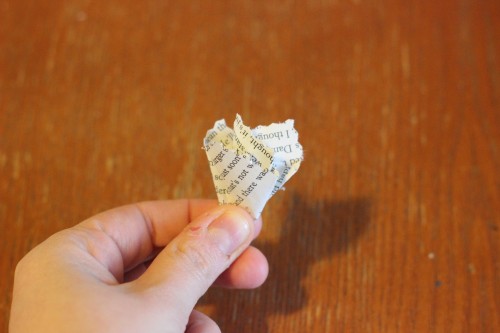
Step 6 – Fold each rectangle in half then in half again
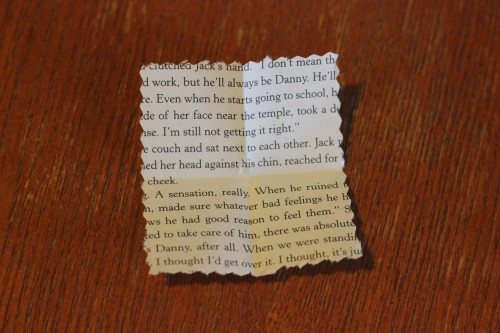
Step 7 – Unfold and pinch the center much like you do when adding tissue paper to a gift.
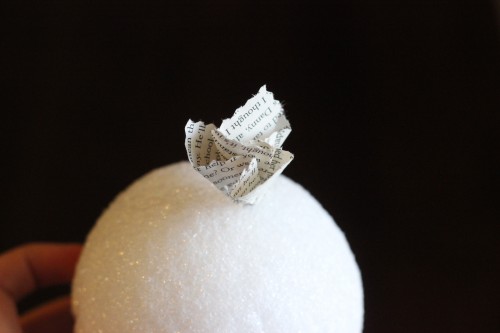
Step 8 – Hot glue each piece onto the styrofoam ball as shown. I used low temp glue gun sticks for this DIY home craft. Not sure if high temp would work just as well or if it would melt the ball or take too long to solidify. If you experiment with high temp let me know how it turns out.
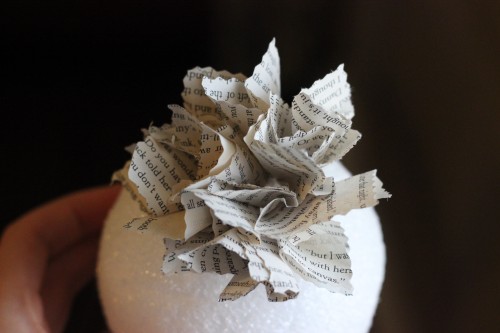
Step 9 – Continue gluing squares close enough to each other that the styrofoam doesn’t peek through.
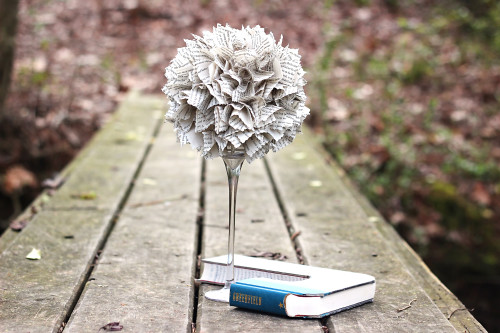
When the ball is completely covered you’re all done!
This is one of my favorite things that I’ve made, probably because it was fun, cheap, and reflects my love of reading. These would make great gift ideas for book-loving friends!
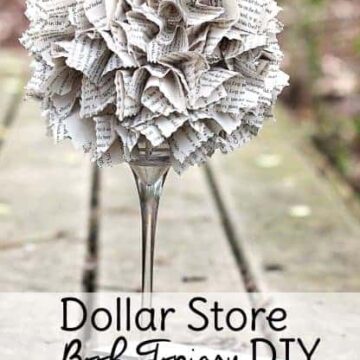
Dollar Tree DIY Centerpiece
Equipment
- Pinking shears or decorative scrapbooking scissors
- Glue gun and glue sticks
- Paper trimmer
Ingredients
- Candle holder
- 4 " Styrofoam ball
- A book
- Stamp Pad optional
- Epoxy glue optional
Instructions
- If you are hot gluing your ball to the candle holder, go ahead and do that now. If you're using epoxy, you can wait until your ball is almost completely covered with paper pieces and then do it, or attach it the day before you begin the project so it has time to dry before you start gluing on pieces.
- Rip out about 50 book pages and use a paper trimmer to trim the margins off.
- Cut 2.5" x 3" rectangles from each page.
- Trim the edges of each piece with pinking shears.
- Fold each pieces in half and the in half again
- Unfold and pinch the center much like you do when adding tissue paper to a gift.
- Hot glue each piece onto the styrofoam ball
- Continue gluing squares close enough to each other that the styrofoam doesn't peek through.
Notes
Now you have a beautiful Dollar Store Decor craft and can brag that you totally do DIY decorating projects. Make more than one and use your Dollar Tree crafts as centerpieces for an event, or be like me and adorn your bookcase or reading nook with your new Dollar Tree store decor.
Dollar Tree Supplies
Using dollar store items for craft projects is a great way to save money. Here are a few of my favorite dollar store supplies to purchase at Dollar Tree:
- Precision Scissors – My local dollar store has these exact scissors from Amazon. They’re great for cutting thread, yarn, embroidery floss, or detailed cuts on paper. Plus you can afford to replace lost ones!
- Alene’s Tacky Glue – It might be in a pretty tiny bottle but it’s easy to pick up when you’re at Dollar Tree for other items so that you always have some on hand.
- Mod Podge
- Floral Foam
- Glue Sticks – They don’t sell glue guns but purchasing glue sticks from Dollar Tree is a money saver.
- Washi Tape
What fun projects have you come up with using Dollar Tree items? Let me know in the comments below.





LjinSc says
I’m going to try to use a cone shape and make a Christmas tree.. I love this.
Jenn says
Ooooo. A Christmas version is a fantastic idea!